It's a new year! So, I'll be looking back at some different projects from 2018 - and the first one, of course, will be Convolutional Art, my flagship project.

Convolutional Art is, in a way, the very definition of procedural generation. The goal was to create an algorithm that could make any sort of visual product, one where you would not be able to guess at how any given piece was made or what would come up as the next product. While other art projects of mine have a pretty idiosyncratic look, what one might call a simple method, the method Convolutional Art is truly out of control.
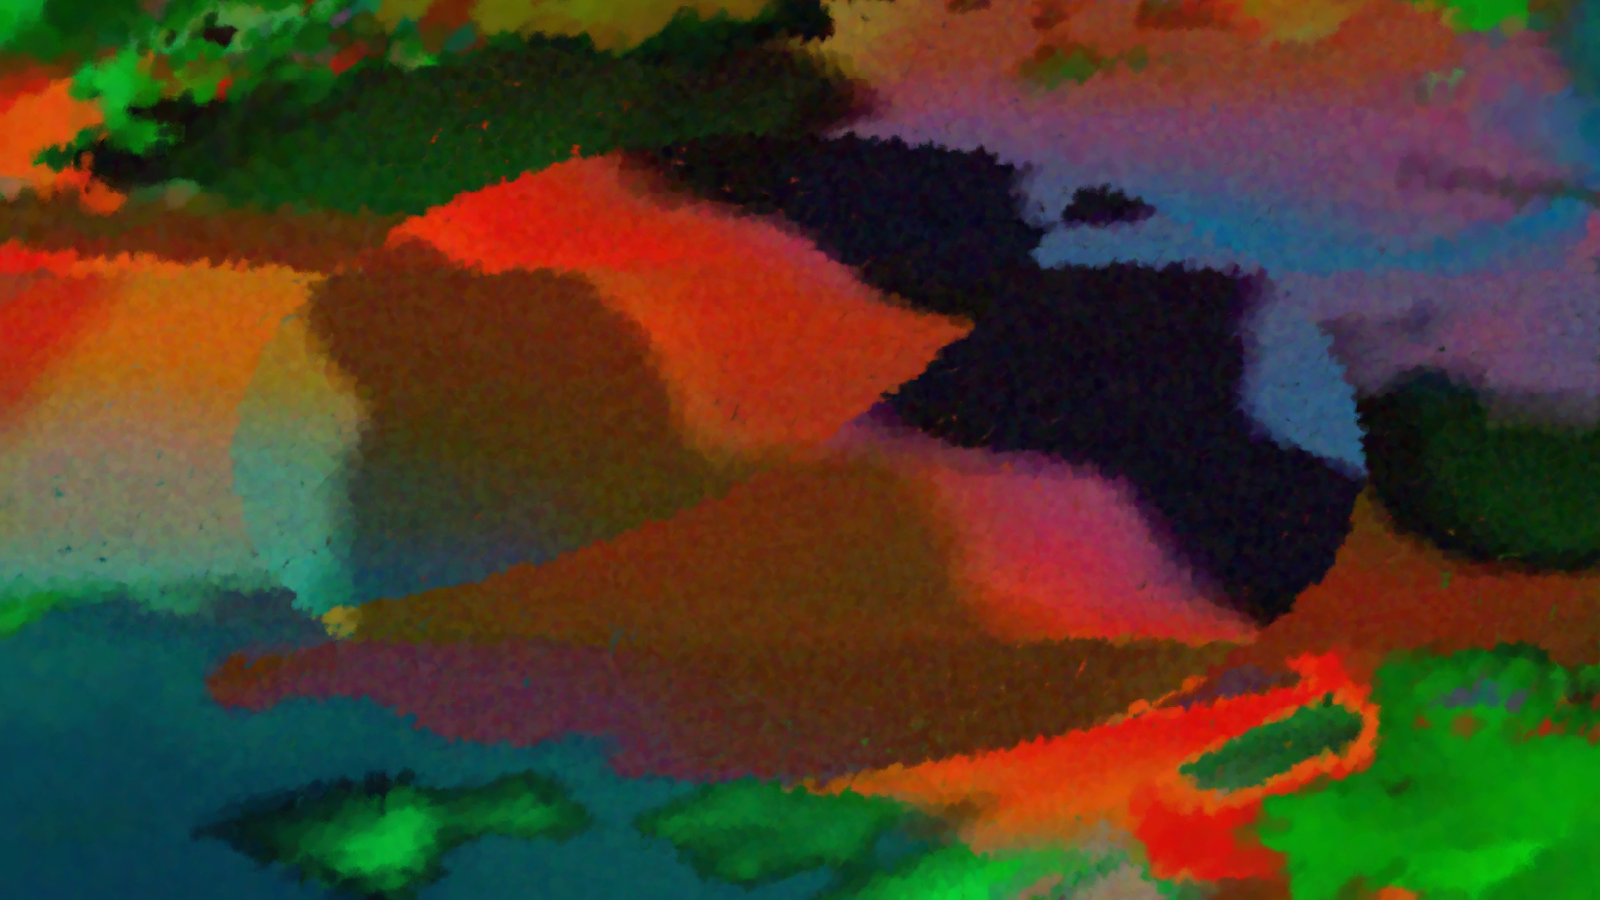
I will now show nine early pictures of Convolutional Art, which, in their simplicity, better than anything portray what the project is all about.


As you can see, while there are some common points, the composition of each piece is very different from the others.
Long story short, the central function of Convolutional Art is a function that takes in a position and spits out a colour. This is done with a 40-length array. The first ten positions of the array are filled with normal, expectable numbers, simple functions and value noise based on the x- and y-coordinate. Then, a random set of rules with combine these values together to fill out the rest of the thirty positions of the array.
You can imagine each value of this array as a colour between black and white, and the array as a series of pictures related to each-other through combinations simple and complex:


Some of the same elements can be seen in each picture, like the different noise functions, but they are combined into quite complex images, where, finally, it becomes difficult to guess at how exactly the pictures came about. With thirty rules each taking one of seven mathematical functions combining two arbitrary previous values, virtually infinite possibilities exist.
But how do we go from these black-white values to colours, and from simple, glitchy textures, to pictures? Here, three values of those forty described are most important:
 These mix together four pre-picked colours, so-called pigments, as illustrated in the tree above. Since the three values differ throughout the picture, so will the way the three pigments are mixed.
While just three are necessary for the pigment selection, in total, around ten of the values are used, to add extra control of hue, shading, and non-colour factors, such as size- and shape of brush-strokes.
Also, some pictures use digital colouring instead, foregoing the pigment method described above to just use Hue, Saturation and Value components determined by the three values instead. This is good for rainbows.


In these eight newer pieces (of which the boar at the top of the page is the ninth), we also see some extra effects like a drunken-walk, and splitting into foreground and background.
How do I get these nice pictures? Well, selection is the only thing required from the user of the program. However, there is also a built-in selection function, which creates four mutations of the piece, allowing the user to pick the best one to then mutate once more, and then, generation by generation, hone into a good design.
Now, this is all well and good. However, I decided I wanted to rewrite the program from the bottom up, make it open-source and embedded in the browser. So now, it exists in an almost-fully-featured version on OpenProcessing, and I also have a full, step by step tutorial up. The interesting thing, however, is that this new version creates decidedly different pictures.


I'll be honest and admit I prefer the original version. This is a sad admission to have to make. The whole program is different, the only common thing being the idea behind it. An easy to explain difference is in the values in that 40-position array. In the original, depending on mathematical functions, they could take any number, positive or negative, which meant that the algorithm often spun out of control. In the new version, all values stay between zero and one. However, this control is not always positive, as can be seen.
However, the difference isn't really obvious from a single one-to-one picture comparison. Neither can the method of Convolutional Art really be understood this way. The goal was not to create a good piece of art, but to be able to create any and all pieces of art. I argue that the program is to be understood best as a series of images.
So the question remains, how does one really represent a program whose sole goal is to be unexpectable, unrepresentable? Above, I have shown 27 pictures, which give some sort of idea of the limits of the program, but you must admit, the limits are quite wide.
I had another idea to show this diversity: A single image iterated upon into thirty unique versions.

While each of the thirty iterations do not necessarily hold up as a piece of art in themselves, I feel the collection of the thirty is quite striking. They highlight just how wide the limits of the program are - and then, in a way, also what the program is good at and what it struggles with a bit more.
This, then, is where the project stands today. When I started back in April, up until producing those first nine images at the top of the post, it was a project of a week. Then, a month later, a bit more. And so on, and so on. Exactly where this will go, I cannot say. But chances are, I'll be able to do a similar review next year.
If you are interested in more, if you want a deeper insight into how it works, I have a step by step tutorial up. If you want to try it for yourself, a pretty well-featured version has been ported to OpenProcessing. Or just ask me anything. I am terribly in love with this project.
Convolutional Art is, in a way, the very definition of procedural generation. The goal was to create an algorithm that could make any sort of visual product, one where you would not be able to guess at how any given piece was made or what would come up as the next product. While other art projects of mine have a pretty idiosyncratic look, what one might call a simple method, the method Convolutional Art is truly out of control.
I will now show nine early pictures of Convolutional Art, which, in their simplicity, better than anything portray what the project is all about.
As you can see, while there are some common points, the composition of each piece is very different from the others.
Long story short, the central function of Convolutional Art is a function that takes in a position and spits out a colour. This is done with a 40-length array. The first ten positions of the array are filled with normal, expectable numbers, simple functions and value noise based on the x- and y-coordinate. Then, a random set of rules with combine these values together to fill out the rest of the thirty positions of the array.
You can imagine each value of this array as a colour between black and white, and the array as a series of pictures related to each-other through combinations simple and complex:
Some of the same elements can be seen in each picture, like the different noise functions, but they are combined into quite complex images, where, finally, it becomes difficult to guess at how exactly the pictures came about. With thirty rules each taking one of seven mathematical functions combining two arbitrary previous values, virtually infinite possibilities exist.
But how do we go from these black-white values to colours, and from simple, glitchy textures, to pictures? Here, three values of those forty described are most important:
While just three are necessary for the pigment selection, in total, around ten of the values are used, to add extra control of hue, shading, and non-colour factors, such as size- and shape of brush-strokes.
Also, some pictures use digital colouring instead, foregoing the pigment method described above to just use Hue, Saturation and Value components determined by the three values instead. This is good for rainbows.
In these eight newer pieces (of which the boar at the top of the page is the ninth), we also see some extra effects like a drunken-walk, and splitting into foreground and background.
How do I get these nice pictures? Well, selection is the only thing required from the user of the program. However, there is also a built-in selection function, which creates four mutations of the piece, allowing the user to pick the best one to then mutate once more, and then, generation by generation, hone into a good design.
Now, this is all well and good. However, I decided I wanted to rewrite the program from the bottom up, make it open-source and embedded in the browser. So now, it exists in an almost-fully-featured version on OpenProcessing, and I also have a full, step by step tutorial up. The interesting thing, however, is that this new version creates decidedly different pictures.
I'll be honest and admit I prefer the original version. This is a sad admission to have to make. The whole program is different, the only common thing being the idea behind it. An easy to explain difference is in the values in that 40-position array. In the original, depending on mathematical functions, they could take any number, positive or negative, which meant that the algorithm often spun out of control. In the new version, all values stay between zero and one. However, this control is not always positive, as can be seen.
However, the difference isn't really obvious from a single one-to-one picture comparison. Neither can the method of Convolutional Art really be understood this way. The goal was not to create a good piece of art, but to be able to create any and all pieces of art. I argue that the program is to be understood best as a series of images.
So the question remains, how does one really represent a program whose sole goal is to be unexpectable, unrepresentable? Above, I have shown 27 pictures, which give some sort of idea of the limits of the program, but you must admit, the limits are quite wide.
I had another idea to show this diversity: A single image iterated upon into thirty unique versions.
While each of the thirty iterations do not necessarily hold up as a piece of art in themselves, I feel the collection of the thirty is quite striking. They highlight just how wide the limits of the program are - and then, in a way, also what the program is good at and what it struggles with a bit more.
This, then, is where the project stands today. When I started back in April, up until producing those first nine images at the top of the post, it was a project of a week. Then, a month later, a bit more. And so on, and so on. Exactly where this will go, I cannot say. But chances are, I'll be able to do a similar review next year.
If you are interested in more, if you want a deeper insight into how it works, I have a step by step tutorial up. If you want to try it for yourself, a pretty well-featured version has been ported to OpenProcessing. Or just ask me anything. I am terribly in love with this project.
That s really interesting, thank you for the tutorial as well !
ReplyDeleteThis is amazing!
ReplyDelete